 SCREEN
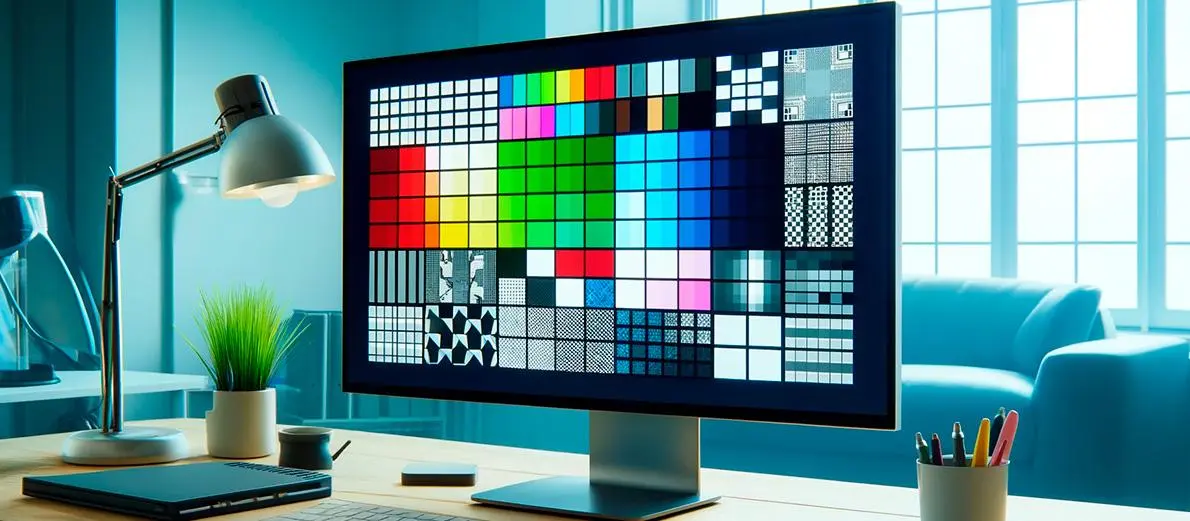
📌 Quick Summary: A monitor can look perfectly fine during everyday use and still have defects that become obvious when you test it properly. A complete monitor screen test should check for dead and stuck pixels, backlight bleed, IPS glow, OLED burn-in, contrast problems, colour banding, ghosting, refresh rate behaviour, viewing-angle issues and flickering. You can perform many of these checks for free in a web browser using full-screen test patterns. However, browser tests are diagnostic aids, not laboratory measurements. They can reveal visible problems, but they cannot replace a colourimeter, photometer or professional motion-analysis equipment. This guide explains how to prepare your display, perform eight essential tests, interpret the results and decide what to do if something looks wrong.
Why Every Monitor Needs a Proper Screen Test
A new monitor should not be judged only by how attractive its picture looks in a shop or on a product page. A display can have a defective pixel, uneven illumination, visible motion trails or an uncomfortable flicker that you may not notice until you start using it every day.
That is why a monitor screen test is worth performing as soon as you unpack a new display. It is also useful when buying a second-hand monitor, checking an older screen, diagnosing a visual problem or preparing a monitor for professional work.
For a new purchase, testing early is particularly important. Retailer return periods and manufacturer warranty conditions vary, and some pixel-defect policies have specific requirements. You should identify and document any visible problem while you still have access to the relevant return or support process.
The same principle applies to used equipment. A monitor may have an attractive price, a clean case and a convincing product description while hiding a bright pixel, a dark patch or an uneven backlight. A few minutes of testing can help you make a more informed decision before handing over your money.
A screen test is not just about finding faults. It also helps you understand the characteristics of your display. You may discover that a dark corner is normal IPS glow rather than a damaged panel, or that motion blur is related to the monitor's response-time settings rather than a hardware failure.
The important thing is to test methodically. Changing several settings at once, testing in a brightly lit room or relying on a single image can lead to incorrect conclusions.
What Is an Online Monitor Screen Test?
An online monitor screen test is a browser-based diagnostic tool that displays specific colours, patterns, gradients or moving objects across your screen. You open the test page, select a pattern and inspect the display for visible irregularities.
For example, a full-screen white pattern makes dark pixel defects easier to notice. A black pattern can reveal bright pixels and some forms of uneven illumination. Red, green and blue patterns help identify individual subpixel problems.
Other tests use gradients, moving objects or geometric patterns. These can help you inspect colour transitions, motion behaviour, scaling and certain display characteristics.
Most online tests work without installing software. They are convenient because they run in a standard web browser and can be used on desktop monitors, laptop screens and many other devices.
What a browser test can and cannot tell you
A browser-based test can reveal visible defects under the conditions in which you perform it. It is particularly useful for checking pixels, looking for obvious non-uniformity and inspecting motion by eye.
However, the browser is only one part of the display chain. The operating system, graphics driver, GPU, browser colour management, display settings and monitor processing can all affect what appears on screen.
This means an online test should not be treated as a certified measurement of colour accuracy, contrast ratio, response time or refresh rate. Those measurements require appropriate instruments and controlled testing conditions.
- Good for visual inspection: dead pixels, stuck pixels, obvious colour irregularities, visible image retention and some uniformity problems.
- Useful for motion inspection: ghosting, trailing, overshoot and apparent motion clarity.
- Limited for precise measurements: colour accuracy, gamma, contrast ratio, luminance, PWM frequency and actual pixel response time.
- Not a hardware repair tool: a browser cannot repair a physically damaged panel or guarantee that a defective pixel will recover.
Think of an online monitor test as the first stage of a sensible diagnosis. It helps you identify what deserves closer attention and whether professional measurement or manufacturer support may be necessary.
Before You Start: Prepare Your Monitor Correctly
Preparation has a significant effect on the reliability of a visual test. A reflection, an incorrect picture mode or an aggressive dynamic-contrast setting can make a normal display look defective or hide a problem that would otherwise be visible.
Before running the tests, take a few minutes to establish consistent conditions.
1. Clean the screen carefully
Dust, fingerprints and dried cleaning marks can look like pixel defects, particularly when you display a solid white or black pattern.
Switch the monitor off and allow the surface to cool if necessary. Use a clean, soft microfiber cloth and follow the manufacturer's cleaning instructions. Do not spray liquid directly onto the screen, apply excessive pressure or use household glass cleaner unless the manufacturer explicitly permits it.
After cleaning, switch the monitor back on and inspect the surface under normal room lighting. This helps you distinguish a physical mark on the coating from a defect inside the display panel.
2. Choose a suitable room and viewing position
For pixel testing, avoid direct sunlight and strong reflections. A reflection can hide a small defect or create the appearance of a bright spot that is not actually part of the displayed image.
For black-screen uniformity testing, use a dim room rather than complete darkness if you are not accustomed to evaluating displays. Sit at your normal viewing distance and look directly at the screen.
Do not press your face against the panel. A display should be evaluated under realistic viewing conditions, not only from a few centimetres away.
3. Disable automatic picture adjustments temporarily
Some monitors automatically change brightness, contrast or colour depending on the displayed content or ambient lighting. These features can interfere with a consistent test.
Where available, temporarily disable the following features:
- Dynamic contrast or automatic contrast.
- Automatic brightness or ambient-light adjustment.
- Low blue-light modes and Night Light.
- Automatic colour temperature adjustments.
- HDR, if it is not needed for the particular SDR test.
- Power-saving picture modes that noticeably change luminance.
Do not permanently change your preferred settings just to run a diagnostic. You can restore them after testing.
4. Use a consistent brightness level
Set brightness to a comfortable, moderate level. Maximum brightness is rarely necessary for ordinary visual inspection and can exaggerate some problems, especially edge illumination and reflections.
For uniformity checks, record the brightness setting you used. If you compare two monitors, use similar viewing conditions and remember that their brightness controls may not produce the same measured luminance.
5. Allow the monitor to stabilise
Turn the monitor on and allow it to operate for approximately 15 to 30 minutes before making detailed observations. This gives the display time to settle into its normal operating condition.
The exact stabilisation time depends on the display technology, model and environment. A warm-up period does not make every monitor behave identically, but it helps reduce differences between observations.
6. Use the correct display resolution and connection
Set the monitor to its native resolution whenever possible. A display running below its native resolution may use scaling, which can make text and fine patterns appear less sharp.
Check that the operating system recognises the correct display and that the cable and port support the resolution and refresh rate you intend to test. A poor connection or incorrect configuration can create symptoms that have nothing to do with the panel itself.
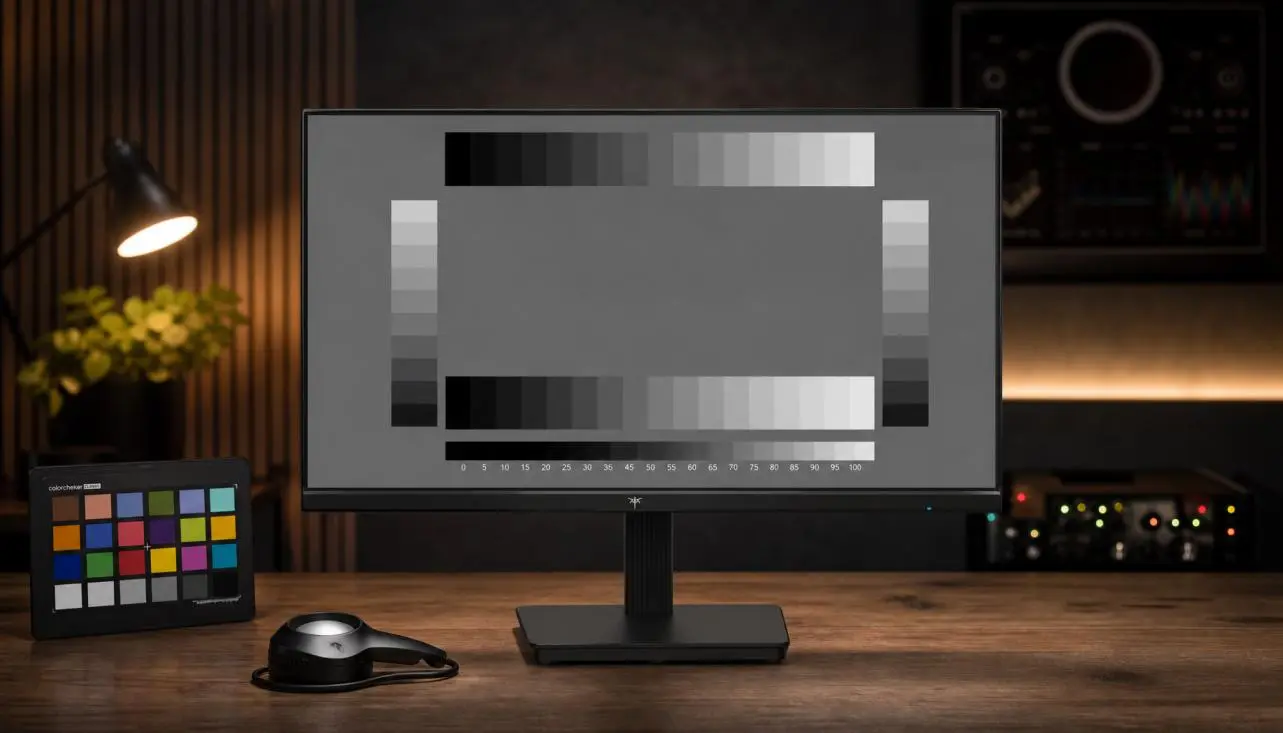
A clean screen, controlled lighting and consistent settings make visual monitor testing more reliable.
Test 1: Dead Pixels, Stuck Pixels and Subpixel Defects
Pixel testing is one of the most important parts of a monitor screen test. A pixel is the smallest addressable picture element in a digital display. On a typical colour monitor, each pixel contains red, green and blue subpixels that combine at different intensities to create the colours you see.
A defect in one pixel or subpixel can create a small dot that remains visible while the rest of the image changes.
Dead pixels
A dead pixel is generally a pixel that no longer produces light correctly. It often appears as a small black or dark point, especially when the surrounding screen is displaying a bright colour.
A genuinely dead pixel is usually a hardware defect. Software cannot reliably restore a failed transistor or damaged pixel circuit.
Stuck pixels
A stuck pixel is a pixel or subpixel that remains in an incorrect state. It may appear as a red, green, blue or bright point when the surrounding image changes.
Some stuck-pixel problems may respond to repeated pixel transitions, but there is no guarantee. A pixel that remains defective after reasonable testing may require manufacturer assessment.
How to perform a dead pixel test
Open a trusted full-screen pixel test and display each of the following colours separately:
- Black: Look for bright or coloured dots that remain visible against the dark background.
- White: Look for dark dots or small areas that do not illuminate like the surrounding pixels.
- Red: Check for dark or differently coloured points that interrupt the red field.
- Green: Look for missing or abnormal green subpixels.
- Blue: Check for missing or abnormal blue subpixels.
Move your eyes slowly across the display. Inspect the centre, edges and corners rather than looking only at the middle.
Repeat the sequence once. If you see a suspicious point, note its exact position and check whether it remains in the same location on different colour backgrounds.
How to distinguish a pixel defect from dust or a mark
A pixel defect remains associated with the same screen position and changes appearance according to the displayed colour. Dust or a mark is usually on the surface and may look different when you change your viewing angle or clean the panel.
If you are unsure, switch the monitor off and inspect the surface under room lighting. Do not press the screen to investigate a suspected defect.
For a more detailed explanation, read Dead Pixel vs Stuck Pixel: What's the Difference?.
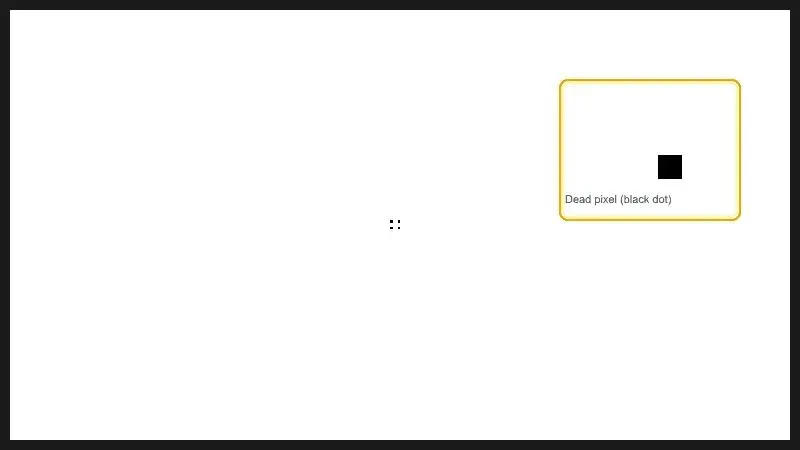
Solid colour patterns make isolated pixel defects easier to identify.
Test 2: Screen Uniformity, Backlight Bleed and IPS Glow
Screen uniformity describes how consistently a display reproduces brightness and colour across its surface. A monitor with poor uniformity may look brighter in one corner, darker near an edge or slightly different in colour from one region to another.
These differences are particularly noticeable when viewing large areas of a single colour, such as a white document, a grey background or a dark scene.
What is backlight bleed?
Backlight bleed is associated with LCD monitors that use a backlight behind the liquid-crystal panel. Light may escape unevenly around the edges or corners, creating bright patches that are particularly visible on dark images.
The amount of visible leakage varies between models and individual units. A photograph taken in a dark room can exaggerate the effect because a camera may use a longer exposure or higher sensitivity than the human eye.
What is IPS glow?
IPS glow is an optical characteristic associated with IPS LCD technology. It can appear as a lighter glow in dark areas, particularly when viewed from an angle or at a short distance.
Unlike fixed backlight bleed, IPS glow changes noticeably when your viewing position changes. Moving your head slightly or sitting at a normal distance can reduce its apparent intensity.
How to test screen uniformity
- Display a full-screen black pattern in a dim room.
- Set brightness to a moderate level rather than maximum.
- Look for bright areas along the edges and corners.
- Move your head slightly to see whether the glow changes.
- Display a mid-grey pattern and inspect the screen for uneven patches.
- Display white and look for obvious differences in brightness or colour temperature.
Do not automatically classify every bright corner as a defect. Some variation is normal, and the acceptable level depends on the monitor, panel technology and manufacturer's specifications.
For a fair assessment, judge the screen from your normal seating position. If a bright patch is distracting during ordinary use, document it and compare it with the manufacturer's support guidance.
Learn more in Backlight Bleed vs IPS Glow: What's the Difference?.
Test 3: OLED and QD-OLED Burn-In and Image Retention
OLED displays work differently from conventional LCD monitors. Each OLED pixel produces its own light, so the display does not need a separate backlight. QD-OLED is a type of OLED display that uses quantum-dot technology as part of its colour-generation system.
These technologies can deliver deep blacks and strong contrast, but they have specific characteristics that should be considered when evaluating a used or heavily used screen.
What is OLED burn-in?
Burn-in is persistent image retention caused by uneven ageing of the display's light-emitting pixels. If certain areas repeatedly display bright static elements, those pixels may age differently from the rest of the panel.
Over time, this can leave a visible outline of a logo, taskbar, news ticker, game interface or other frequently displayed element.
Burn-in is different from a temporary image-retention effect. A temporary image may remain visible briefly after a static image disappears, then gradually fade. Persistent burn-in is more difficult to resolve and may not disappear through normal use.
How to test an OLED monitor for burn-in
Use full-screen colour patterns and inspect the display carefully:
- Grey: Often useful for revealing uneven ageing and subtle retained shapes.
- White: Helps identify areas that appear noticeably different in brightness or colour.
- Red, green and blue: Can reveal colour-specific differences across the panel.
- Dark grey: May make certain image-retention patterns easier to notice.
Look for shapes that resemble a taskbar, application window, channel logo, game HUD or other static interface element. Inspect the centre and edges of the screen.
If you are buying a used OLED monitor, ask about its usage history and whether the manufacturer's maintenance features have been used according to the manual.
Can OLED burn-in be fixed?
There is no guaranteed software repair for permanent burn-in. Some displays include automatic compensation cycles or a pixel-refresh feature designed to manage panel characteristics.
Use these features only as described by the manufacturer. Do not repeatedly force manual refresh cycles in the hope of removing a persistent defect. Unnecessary maintenance cycles may add wear rather than solve the underlying problem.
If a visible pattern remains, contact the manufacturer or an authorised service provider to understand the available options and warranty coverage.
Test 4: Contrast, Black Levels, Gamma and Black Crush
Contrast describes the difference between the brightest white and the darkest black a display can produce under specified conditions. It has a major influence on how images look, particularly in films, games and dark scenes.
A monitor with poor black-level performance may make dark scenes look grey or washed out. On the other hand, incorrect settings can crush shadow detail, making several different dark shades appear almost identical.
What is black crush?
Black crush occurs when details in dark areas become difficult or impossible to distinguish because multiple near-black tones are displayed too similarly.
For example, a dark jacket, a shadow and a black background may merge into one large area. This can be caused by monitor settings, graphics output levels, gamma configuration or the characteristics of the display itself.
What is gamma?
Gamma describes the relationship between the digital signal level and the brightness produced by the display. It influences how midtones and shadow details appear.
Incorrect gamma can make an image look too dark, too bright or lacking in tonal separation. A browser test can help you inspect visible gradient behaviour, but it cannot certify the monitor's gamma response.
How to perform a contrast and black-level test
- Display a black-level test pattern containing several very dark grey blocks.
- Check whether the darkest blocks are distinguishable from the black background.
- Display a white-level pattern with several bright grey steps.
- Look for visible separation between the brightest shades.
- Inspect a smooth gradient from black to white for abrupt transitions.
If several dark blocks disappear, do not immediately assume the panel is defective. Check the monitor's brightness, contrast, gamma and black-level settings. Also verify that the graphics output range is configured correctly for the display.
Dynamic contrast, local dimming and HDR can change the appearance of these patterns. For a basic SDR inspection, use a consistent SDR picture mode and avoid automatic processing where possible.
Test 5: Colour Accuracy, Gradients and Banding
Colour performance matters for almost every type of monitor use. Office workers need comfortable and consistent colours, gamers want an attractive image, and photographers or designers may require a more controlled and accurate display.
However, colour accuracy and colour appearance are not the same thing. A screen can look vivid and attractive while reproducing colours inaccurately.
What is colour banding?
Colour banding occurs when a smooth gradient appears as a series of visible steps or stripes instead of a continuous transition.
It can be related to limited colour precision, signal processing, compression, software behaviour or the content itself. A gradient test can help reveal visible banding, but it cannot identify the exact cause on its own.
Understanding 8-bit and 10-bit colour
An 8-bit channel can represent 256 levels for each primary colour channel. A 10-bit channel can represent 1,024 levels per channel.
More available tonal levels can help produce smoother transitions, particularly in demanding HDR workflows and high-quality image production. However, the result depends on the entire signal chain, not just the monitor's marketing specification.
Some displays use 8-bit panels with Frame Rate Control (FRC) to simulate additional tonal steps. The graphics card, operating system, application, connection and monitor settings must also support the intended output mode.
How to test gradients and colour transitions
- Display a smooth black-to-white gradient.
- Look for obvious horizontal or vertical steps.
- Inspect red, green and blue gradients separately.
- Check colour transitions from one hue to another.
- Repeat the test with your normal display settings.
Remember that a gradient generated by a browser may be affected by the browser's rendering pipeline, operating-system colour management and graphics output settings.
Can an online test measure colour accuracy?
No. An online pattern can reveal obvious colour problems, but it cannot tell you precisely whether a monitor reproduces a particular colour standard.
For reliable colour calibration, use a suitable hardware colourimeter or spectrophotometer with compatible calibration software. This equipment measures the display's output and can help create an ICC profile for a supported workflow.
An ICC profile helps colour-managed applications interpret and reproduce colour more consistently. It is not a substitute for every form of hardware adjustment, and its usefulness depends on the operating system and application support.
Test 6: Refresh Rate, Response Time and Ghosting
Motion performance is especially important for gaming, sports, fast-moving video and everyday scrolling. A monitor can display a sharp static image while producing visible trails or blur when objects move across the screen.
Three terms are particularly important: refresh rate, response time and motion clarity.
What is refresh rate?
Refresh rate is the number of times a display updates its image each second. It is measured in hertz (Hz).
A 60Hz monitor refreshes its image 60 times per second. A 144Hz monitor can refresh up to 144 times per second, while a 240Hz model can refresh up to 240 times per second when correctly configured and supplied with a compatible signal.
A higher refresh rate can make motion appear smoother, but the computer must also produce and deliver frames at a suitable rate. The connection, graphics hardware, operating system and display settings all matter.
What is response time?
Pixel response time describes how quickly a pixel changes from one state to another. Manufacturers may advertise figures such as 1ms, but the measurement method and transition conditions matter.
A single advertised response-time figure does not describe every possible transition. Some transitions may be faster than others, and aggressive overdrive settings can introduce visible overshoot.
What is ghosting?
Ghosting is a visible trail behind a moving object. It can occur when pixels do not change quickly enough to keep up with the motion being displayed.
Inverse ghosting, sometimes called overshoot, appears as a bright or dark halo around a moving object. It can happen when the monitor's overdrive setting pushes pixel transitions too aggressively.
How to perform a motion and ghosting test
A moving-object test, such as the UFO motion test, can help you inspect motion behaviour visually.
- Open a reputable motion test in your browser.
- Confirm that the browser is displaying the test at the intended refresh rate where the test provides that information.
- Use a moving object against a contrasting background.
- Observe whether the object leaves a visible trail.
- Look for bright or dark overshoot around the moving shape.
- Repeat the test with different overdrive settings if your monitor provides them.
Keep the conditions consistent. Browser performance, frame delivery, display synchronisation, camera recording settings and your own visual perception can all influence the result.
A browser-based motion test is useful for comparing settings and identifying obvious problems. It is not a laboratory measurement of pixel response time.
How to check your refresh rate
Use your operating system's display settings to check the refresh rate currently selected for the monitor. In Windows, open Display settings, select the relevant display and locate the advanced display options.
Make sure the selected resolution and refresh rate are supported by the monitor and the connection. If a high-refresh-rate display is running at 60Hz, the issue may simply be a configuration or connection limitation.
Test 7: Viewing Angles and Colour Shift
Viewing angles describe how the image changes when you look at the screen from different positions. The amount of brightness loss, contrast change or colour shift depends on the panel technology and monitor design.
This is important if you regularly share your screen, work with several windows, sit away from the centre or use a large display at a short distance.
How different panel technologies behave
- TN (Twisted Nematic): Traditional TN panels can show more noticeable colour and contrast changes when viewed from above, below or from the sides.
- VA (Vertical Alignment): VA panels are often chosen for their strong native contrast, although viewing-angle behaviour and dark-level transitions vary between models.
- IPS (In-Plane Switching): IPS displays generally offer broad viewing angles and relatively consistent colour, although IPS glow may be visible in dark scenes.
- OLED: OLED monitors often maintain strong image quality across wide viewing angles, but actual performance still depends on the panel and product design.
How to perform a viewing-angle test
- Display a neutral grey or colour test pattern.
- Look at the screen directly from the centre.
- Move gradually to the left and right.
- Repeat the observation from slightly above and below.
- Look for changes in brightness, contrast and colour.
Do not confuse normal viewing-angle characteristics with a defect. The purpose is to understand how the display behaves in realistic positions and determine whether the change is excessive for your intended use.
Test 8: Screen Flickering, PWM and Eye Comfort
Flickering is a change in screen brightness over time. Some forms are obvious, while others are difficult to notice directly but may be detected by a camera or measuring instrument.
One possible cause is Pulse Width Modulation (PWM), a method some displays use to control brightness by switching the light source on and off rapidly.
Not every monitor uses PWM, and not every person reacts to flicker in the same way. Some displays use other brightness-control methods, while others combine different techniques depending on the brightness setting.
What is PWM dimming?
With PWM dimming, brightness is controlled by changing the proportion of time a light source is on during a repeating cycle. This is commonly described using duty cycle.
The frequency and modulation depth influence the characteristics of the flicker. A high-frequency signal may be less noticeable to some users, but frequency alone does not provide a complete description of visual comfort.
How to look for visible flicker
First, observe the monitor at several brightness levels under normal lighting. Look for obvious pulsing, unstable brightness or unusual changes when the brightness setting is adjusted.
You can also use a smartphone camera in slow-motion mode as a rough visual aid. Some flicker patterns may appear as dark bands or moving lines in the recording.
However, camera results must be interpreted carefully. Rolling shutter, exposure time, frame rate and camera processing can create bands even when the display does not produce a problem that is visible to the human eye.
A camera recording cannot reliably establish the exact PWM frequency or prove that a monitor is flicker-free. For technical verification, use an appropriate photodiode or flicker-measurement instrument and consult the manufacturer's specifications.
What if a monitor causes eye discomfort?
Eye discomfort can have several causes, including glare, reflections, unsuitable brightness, poor viewing distance, prolonged near work, uncorrected vision problems and display flicker.
Start with practical adjustments:
- Match screen brightness to the surrounding environment.
- Reduce reflections from windows and overhead lights.
- Keep the monitor at a comfortable viewing distance.
- Adjust text size and contrast for comfortable reading.
- Take regular breaks from prolonged close-up work.
- Check the manufacturer's flicker and dimming specifications if flicker is a concern.
If discomfort persists, do not assume the monitor is the only cause. Consider seeking advice from an appropriate eye-care professional.
Free Online Monitor Testing Tools Compared
You do not need to install a large diagnostic application to perform a useful first inspection. Several established websites provide free patterns or browser-based tests that can help you evaluate different aspects of a display.
Each tool has a different purpose. Some focus on simple colour patterns, while others are more specialised for motion or display uniformity.
1. Screen Medic
Best for: A straightforward first check of visible screen defects.
Screen Medic provides browser-based screen testing designed to help users inspect display problems without installing additional software. Full-screen colour patterns are useful for looking for dead pixels, stuck pixels and obvious colour irregularities.
For a basic inspection, open the tool, select a solid colour and examine the entire panel. Repeat with the other available colours and note any suspicious points.
The advantage of a browser-based tool is convenience. You can run the test directly on a compatible device and repeat it whenever you need to inspect the screen.
Remember that the result is a visual diagnostic. It does not certify colour accuracy, measure actual response time or replace a professional display instrument.
Open the free Screen Medic screen test.
2. EIZO Monitor Test
Best for: A range of visual display checks.
EIZO's monitor test is a recognised browser-based resource that provides different test patterns for inspecting display characteristics. Depending on the available test selection, users can examine aspects such as pixel defects, uniformity, gradients, sharpness and viewing behaviour.
It is useful when you want more than a single solid-colour pattern. You can move through the available tests and inspect how the monitor handles different types of visual information.
As with other browser-based tests, the patterns are intended for visual inspection. They do not replace laboratory measurements or guarantee that every type of defect will be detected.
Visit the EIZO monitor test resource.
3. TestUFO
Best for: Motion handling, refresh-rate behaviour and ghosting inspection.
TestUFO provides browser-based motion tests that are particularly useful when evaluating gaming monitors and other displays used for fast-moving content.
Moving objects can help you observe visible trails, motion blur and overdrive behaviour. The tests can also help you understand how motion appearance changes when you use different refresh-rate settings.
For meaningful comparisons, make sure the browser and display are operating under consistent conditions. A test may not run as intended if the browser is dropping frames or the monitor is configured at an unexpected refresh rate.
Do not treat a visual result as a certified response-time measurement. Professional response-time testing requires more controlled methods.
4. Dead Pixel Buddy
Best for: Simple solid-colour pixel inspection.
Dead Pixel Buddy is a simple resource for displaying different colours across a screen. The idea is straightforward: a uniform background makes a pixel that behaves differently from its neighbours easier to notice.
Use black, white and primary-colour backgrounds to inspect the display. If you find a suspicious point, repeat the test and check whether it remains in exactly the same position.
Simple tools like this can be useful because they avoid unnecessary complexity. They are not designed to measure every aspect of display performance.
Which monitor test should you choose?
- For a quick pixel inspection: Use Screen Medic or a simple solid-colour test such as Dead Pixel Buddy.
- For a broader visual inspection: Use EIZO's monitor test patterns.
- For gaming and motion: Use TestUFO and compare the results at your monitor's supported refresh rates.
- For professional colour work: Use a suitable calibration instrument and software rather than relying on browser patterns alone.
You do not need to run every available tool. Choose the test that matches the problem you are investigating, and use the same conditions when comparing results.
How to Fix Common Monitor Screen Problems
Finding a problem is only the first part of the process. The next step is to understand whether it can be corrected through settings, whether it may respond to a limited troubleshooting attempt or whether it requires manufacturer support.
Fixing a stuck pixel
If a pixel appears stuck on one colour, you may try a software-based pixel-cycling tool. These tools rapidly change the colours displayed in a small area in an attempt to encourage a stuck pixel or subpixel to change state.
There is no guarantee that this method will work. It is more reasonable to try it for a limited period than to leave a flashing pattern running for hours.
Before using a pixel-cycling tool, confirm that the issue is genuinely a stuck pixel rather than a physical mark or a software rendering problem. Stop if the display behaves unexpectedly or if the manufacturer advises against this type of test.
A truly dead pixel is different. If the pixel's hardware has failed, software cycling cannot reliably repair it.
What about pressing or rubbing a pixel?
Do not press, rub or massage the display panel. Pressure can damage the liquid-crystal layer, OLED structure, polariser or other delicate components. It may also create a larger permanent mark.
This is especially risky on thin modern monitors and laptop panels. A small pixel defect is not worth turning into a larger area of screen damage.
Reducing visible backlight bleed or IPS glow
First, check whether the effect changes when you move your head or adjust your viewing distance. If it changes significantly, you may be seeing IPS glow rather than fixed backlight leakage.
Try a moderate brightness setting and inspect the display from your normal seating position. Avoid evaluating the monitor using a photograph with an exaggerated exposure.
Some monitor settings can change the appearance of dark scenes, but they cannot physically correct uneven panel construction. If the problem is severe during normal use, contact the manufacturer or retailer.
Managing OLED image retention
If you see a temporary retained image, allow the display to return to normal varied content and follow the manufacturer's recommended maintenance process.
Use automatic panel-care features as instructed in the user manual. Do not repeatedly trigger manual pixel-refresh cycles or leave static test patterns displayed for unnecessary periods.
If the image remains visible after the recommended process, document it and ask the manufacturer to assess the display.
Correcting colour and gradient problems
Start by checking the monitor's picture mode, colour temperature, contrast and operating-system colour settings. Disable unnecessary image enhancements temporarily and repeat the same gradient test.
If accurate colour reproduction is important, use a hardware calibration device. A colourimeter can measure the monitor's output and help create a suitable profile for a colour-managed workflow.
Reducing ghosting
Check the monitor's overdrive or response-time setting. If the setting is too aggressive, you may see inverse ghosting or bright trails around moving objects.
Try a lower overdrive setting and repeat the same motion test. Also confirm that the display is running at the intended refresh rate and that the graphics system is delivering frames consistently.
Investigating flicker
Check the monitor's brightness settings and manufacturer documentation. If flicker is associated with a particular brightness range, compare the behaviour at other levels.
Try a different supported connection or cable if the display is showing intermittent signal problems, but do not assume that every flicker is caused by PWM. Unstable connections, refresh-rate mismatches, power problems and graphics-driver issues can also produce visual symptoms.
When Should You Contact the Manufacturer?
Not every visible imperfection means that a monitor must be replaced. The appropriate response depends on the defect, the model, the manufacturer's pixel policy and the applicable return or warranty conditions.
Before contacting support, collect useful evidence. This makes it easier to explain what you observed and reduces the chance of an unnecessary back-and-forth exchange.
- Record the monitor's exact model and serial number.
- Keep the purchase receipt or order confirmation.
- Photograph visible pixel defects using a clear, focused image.
- Record the position and appearance of each suspected defect.
- Note the colour pattern on which the defect is most visible.
- Check whether the issue remains after restarting the monitor and computer.
- Read the pixel-defect policy for the exact model.
Some manufacturers distinguish between bright pixels, dark pixels, subpixel defects and clusters. The permitted number and location of defects can vary between product ranges.
Do not assume that one universal pixel threshold applies to every monitor. Warranty conditions can differ according to the manufacturer, model, product category and country.
What is ISO 9241-307?
ISO 9241-307 is part of the ISO 9241 family of standards dealing with ergonomic requirements for electronic visual displays. It includes guidance relevant to display evaluation and pixel-defect classification.
It is useful background when discussing display quality, but it should not be treated as a universal guarantee that a manufacturer must replace a monitor after a particular number of defective pixels.
Always consult the manufacturer's written policy and the consumer-protection rules applicable to your purchase.
How to Test a Used Monitor Before Buying
A second-hand monitor can offer good value, but you should inspect it before completing the purchase whenever possible. A quick visual check is not enough to identify every problem.
Ask the seller to connect the monitor to a computer and allow you to display full-screen patterns. If the seller cannot provide a test, consider that limitation when deciding whether the price is worth the risk.
Your used-monitor inspection sequence
- Check the physical condition: Inspect the screen surface, bezel, stand, ports and power cable for visible damage.
- Display white: Look for dark pixel defects, marks and obvious unevenness.
- Display black: Look for bright pixels and uneven illumination.
- Display red, green and blue: Check for stuck or missing subpixels.
- Display grey: Look for colour tinting, uneven patches and possible OLED retention.
- Test motion: Use a moving-object pattern to inspect ghosting and overshoot.
- Check the settings: Confirm the native resolution and supported refresh rate.
- Test the connections: If possible, check the inputs you intend to use.
If the monitor is OLED, pay particular attention to persistent image retention. If it is an LCD model, inspect dark-screen uniformity and look for obvious backlight problems.
Do not forget to check the stand, power supply, buttons and ports. A monitor that passes the screen test may still have a damaged connector or an unreliable power supply.
For a more detailed buying checklist, read How to Test a Used Monitor Before Buying.
Common Mistakes to Avoid During a Monitor Test
A poor testing method can lead to false alarms. Before deciding that your monitor is defective, avoid these common mistakes.
Testing only one colour
A single white or black screen cannot reveal every pixel problem. Some subpixel defects become easier to see only when a particular primary colour is displayed. Use several solid colours.
Using maximum brightness for every test
Maximum brightness can make edge illumination look more severe and may not reflect your normal working conditions. Use a moderate setting and record it if you need to compare results.
Confusing IPS glow with backlight bleed
Both can appear as brighter areas on a dark screen, but they do not have the same behaviour. Change your viewing position and distance before deciding what you are seeing.
Assuming a browser test measures everything
A browser can display patterns and animations, but it cannot independently measure every physical property of a monitor. Do not treat a visual test as proof of colour accuracy, exact response time or PWM frequency.
Taking photographs in complete darkness and trusting the result
Camera exposure can exaggerate brightness differences and make normal panel characteristics look dramatic. Use photographs as supporting evidence, not as the only basis for judging a defect.
Running flashing patterns for too long
Pixel-cycling tools are not guaranteed repairs. Use them cautiously and for a limited period. Do not leave high-contrast flashing patterns running unnecessarily, particularly if they cause discomfort.
Ignoring the cable and computer settings
Not every visual problem originates inside the monitor. A poor cable, unsupported refresh rate, incorrect output range, graphics-driver issue or unstable connection can affect the displayed image.
Frequently Asked Questions About Monitor Screen Tests
How can I test my monitor screen online for free?
Open a browser-based monitor test, enter full-screen mode and display solid black, white, red, green and blue patterns. Inspect the entire screen for pixel defects. You can then use grey gradients, uniformity patterns and moving-object tests to investigate other visible problems. Online tests are useful for visual inspection but do not replace professional measurement equipment.
What is the best free monitor screen test?
The best tool depends on what you want to inspect. Screen Medic and simple colour-pattern tools are useful for pixel checks. EIZO provides a broader selection of visual test patterns, while TestUFO is particularly useful for motion and ghosting inspection. No single browser tool measures every aspect of display performance.
How do I know if my monitor has a dead pixel?
Display a full-screen white pattern and look for a small dark point that remains in the same position. Repeat the test using red, green and blue backgrounds. A true pixel defect remains associated with the same screen location, although its appearance can change depending on the displayed colour. Clean the screen first to rule out dust or surface marks.
Can an online monitor test fix a dead pixel?
No. An online test can help identify a visible pixel defect, but it cannot repair a physically failed pixel. A software pixel-cycling tool may sometimes help with a stuck pixel, but results are not guaranteed. A genuinely dead pixel usually requires manufacturer assessment or panel replacement if it is covered by the relevant policy.
How long should a monitor screen test take?
A basic pixel inspection can take only a few minutes. A more complete test covering uniformity, gradients, motion, viewing angles and flicker may take 15 to 30 minutes or longer. Allow the display to stabilise before detailed observations and avoid rushing through the patterns.
How do I test a monitor for backlight bleed?
Display a full-screen black image in a dim room and inspect the edges and corners at a moderate brightness level. Look for fixed bright patches or areas of uneven illumination. Change your viewing position to check whether the effect changes. IPS glow is angle-dependent, while backlight bleed is generally more fixed. Camera photographs can exaggerate both effects.
How can I test my monitor for ghosting?
Use a browser-based moving-object test such as TestUFO. Watch the moving object against a contrasting background and look for trails or bright and dark halos. Compare different overdrive settings and confirm that the monitor is running at the intended refresh rate. Browser performance and frame delivery can affect the result.
Can I test my monitor's refresh rate online?
Some browser-based tests can help you inspect whether a display is operating at a particular refresh rate, but you should also check the active refresh-rate setting in your operating system. Confirm that the monitor, cable, graphics card and selected resolution support the desired rate. A browser test alone is not a complete hardware certification.
How do I check whether my OLED monitor has burn-in?
Display full-screen grey, white, red, green and blue patterns. Look for persistent shapes, uneven brightness or colour differences that resemble static interface elements. Temporary image retention may fade, while permanent burn-in is caused by uneven pixel ageing. Follow the manufacturer's maintenance instructions and contact support if a visible pattern remains.
Can a monitor screen test measure colour accuracy?
A browser test can reveal obvious colour irregularities and visible gradient banding, but it cannot provide a reliable colour-accuracy measurement. For accurate calibration, use a compatible hardware colourimeter or spectrophotometer with suitable software. The graphics pipeline and colour-management settings also influence the final result.
Should I test a new monitor immediately after buying it?
Yes. It is sensible to inspect a new monitor soon after purchase, while the retailer's return conditions and manufacturer support options are still available. Check the pixel condition, uniformity, connections, resolution and refresh rate. Keep photographs and purchase documentation if you discover a problem.
Final Monitor Screen Test Checklist
Use this checklist when testing a new, used or existing monitor. It provides a practical sequence without requiring specialist equipment.
- Clean the screen with a suitable microfiber cloth.
- Remove reflections and choose consistent room lighting.
- Disable automatic picture adjustments temporarily.
- Set a comfortable, moderate brightness level.
- Allow the monitor to stabilise before detailed testing.
- Confirm the native resolution and intended refresh rate.
- Display black, white, red, green and blue patterns.
- Check for dead pixels, stuck pixels and subpixel defects.
- Inspect black-screen uniformity and possible backlight bleed.
- Distinguish IPS glow from fixed backlight leakage.
- Check OLED displays for persistent image retention.
- Inspect black levels, white levels and gradient transitions.
- Use a motion test to look for ghosting and overshoot.
- Check viewing-angle behaviour from normal positions.
- Investigate flicker using manufacturer specifications where necessary.
- Record any suspicious defect and check the model's warranty policy.
Final Thoughts: Test Your Monitor Before a Small Problem Becomes a Big One
A monitor screen test is one of the simplest ways to understand the condition of a display. It can help you identify pixel defects, uneven illumination, visible burn-in, motion problems and other characteristics that may affect your everyday experience.
The most effective approach is to combine several tests rather than relying on one pattern. Start with solid colours, inspect uniformity, examine gradients and then move on to motion and flicker checks if they are relevant to your monitor.
Just as importantly, interpret the results carefully. IPS glow is not automatically a defect, a camera recording does not prove PWM behaviour, and a browser gradient cannot certify colour accuracy. Understanding these limitations helps you avoid unnecessary repairs and incorrect warranty claims.
If you discover a problem, document it, check the manufacturer's guidance and decide whether it requires a settings adjustment, further diagnosis or professional support.
Whether you have just bought a new gaming monitor, are checking a used display or simply want to understand your screen better, a few minutes of systematic testing can make a real difference.
🔍 Run the Free Monitor Screen Test
💬 Leave a Comment
Have a question or something to add? Share your thoughts below.
Loading comments...